




Surface preparation before bonding — 7 mistakes that ruin even the best tape
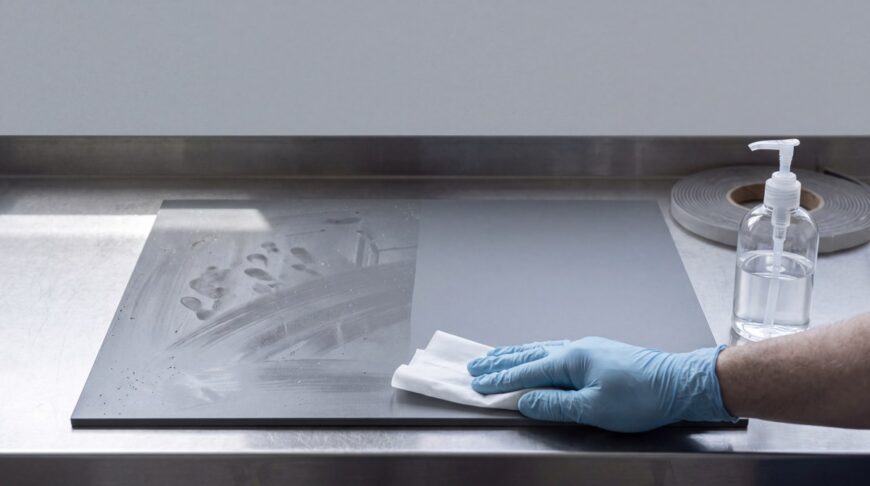
“No adhesive will ever work well on dirt. Cleanliness is the first stage of every bond.”
Tomasz Gorzawski, CVGS
It is said that 80% of adhesive bond failures begin at the surface preparation stage. That is not marketing exaggeration — it is an observation from thousands of production implementations. The best tape or adhesive will not help if the surface is greasy, dusty or cold — or if the ambient conditions at the workstation, temperature and humidity, remain outside any control.
Why surface preparation matters most
A properly prepared surface delivers four measurable benefits: it lets you exploit the adhesive’s properties to the full, ensures stable and repeatable bonds in production, reduces the risk of debonding at later stages of the process, and cuts the number of complaints, rework and material losses.
LSE materials (PP, PE, POM, TPE) have low surface energy — the adhesive does not spread and adhesion is weak or non-existent. That is why they require activating treatment. But even HSE materials (metal, glass, PC, ABS) have minimum cleanliness requirements for the adhesive to reach its full properties.
Two categories of preparation methods
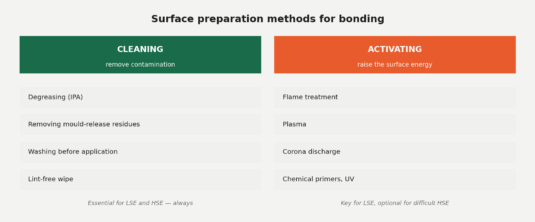
Fig. 1. Two categories of surface treatment in the context of bonding: cleaning — always, activation — for LSE and difficult HSE.
Cleaning methods
Their task is to remove the layer of dirt, grease, dust and contamination. Essential for both LSE and HSE. They include: degreasing with isopropanol (IPA) or dedicated cleaning agents, removing injection-mould release residues, washing parts before application, and wiping with a lint-free cloth.
Activating methods
Their goal is to increase polarity, surface energy and wettability. Crucial for LSE. They include: flame treatment, plasma, corona discharge, UV, ionising radiation, and chemical primers and adhesion promoters. We cover them in detail in the next article of the series (4/10).
7 mistakes that ruin the bond
1. Using the same wipe for many parts
A classic. The operator degreases part after part with the same wipe, which of course delivers ever worse results — instead of removing contamination, it merely spreads it around. Gloves transferring grease onto the surface work exactly the same way. The result: a surface that looks clean but is coated with a thin film of redistributed contamination that effectively blocks adhesion.
SOLUTION
Replace wipes every few parts or use single-use wipes, lint-free materials dedicated to degreasing, fresh gloves. Replacement frequency written into the work instruction. In quality-critical applications — a clean workstation with access control.
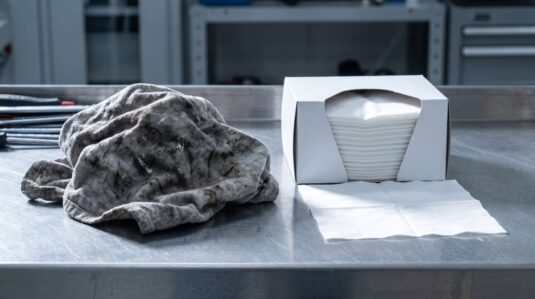
Photo 1. On the left, a tool that spreads dirt; on the right — one that removes it. The difference costs pennies per part. (Illustrative image.)
2. Too little cleaning agent
“A few drops will do” — they will not. The cleaning agent must wet the whole surface, dissolve the greases and evaporate, leaving a clean, dry surface. Skimping on IPA leads to bonding on a partially contaminated surface, and the pennies saved on chemicals come back a hundredfold in complaints.
SOLUTION
Aerosols, chemical dispensers or ready-to-use pre-saturated wipes — the dose stops depending on the operator’s judgement.
3. Bonding at too low a temperature
“Cold adhesive doesn’t stick” — that is no metaphor. Adhesives respond to temperature with their whole behaviour. Bonding below 15°C, or using tape taken straight from a 5–10°C warehouse, means the adhesive has low tack and does not wet the surface — it is hard and stiff, so it cannot fill the micro-roughness. Adhesion then drops by 30–70% (a range from CVGS observations and tests — not a constant for every adhesive and substrate), and bonds start failing on the first day of service.
This rule applies to all types of tapes and adhesives — not only PSA systems. What differs is the scale of the effect, not the mechanism itself.
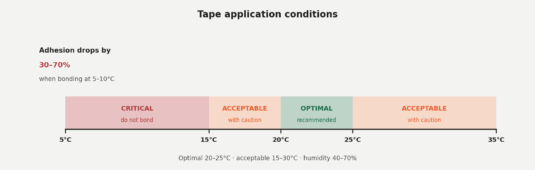
Fig. 2. Tape application temperature ranges. Cold materials need several hours to acclimatise to workstation conditions before they are bonded.
SOLUTION
Monitor workstation conditions, store adhesive materials as the manufacturer recommends, and apply under controlled temperature and humidity: optimally 20–25°C, minimum 15°C, humidity 40–70%. Always verify the exact minimum for a given tape in its TDS.
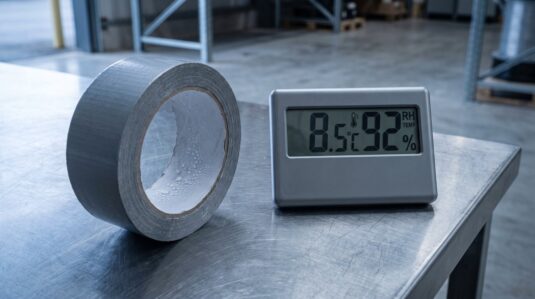
Photo 2. A roll straight from a cold warehouse — condensation on the surface is a signal that application is still a long way off. Acclimatisation takes hours, not minutes. (Illustrative image.)
4. Too much time after removing the liner
PSA adhesives are by definition open to the environment. The moment you remove the protective liner, the adhesive surface starts ageing: the adhesive loses its initial tack and collects dust, particles and micro-contamination. Wettability decreases and the adhesive stops “flowing into” the surface. The result: an adhesion drop of up to 30–60% — the real scale depends on exposure time, dust levels, humidity and workstation temperature (range from CVGS data).
SOLUTION
Optimise the time from exposing the adhesive layer to application. Do not leave opened parts on the production line — this covers process breaks, shift changeovers and ordinary lunch breaks. Partial liner die-cuts that expose the adhesive only at the moment of application are a great help.
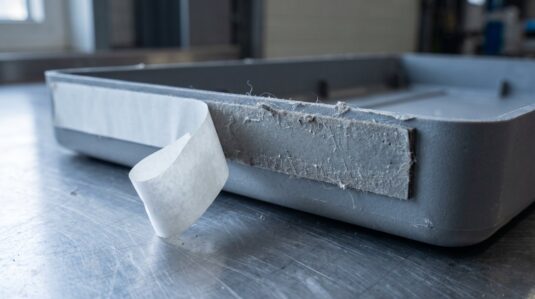
Photo 3. Adhesive exposed “in advance” collects dust and lint from the air — every minute of exposure is a real drop in adhesion. (Illustrative image.)
5. No pressure during application
PSA adhesives are activated by pressure. Laying the tape on gently, uneven pressure, no application roller — all of this means the adhesive does not fill the micro-roughness. In laboratory testing the minimum application pressure is 1.5–3 kg/cm². Without proper pressure we get falsely low adhesion results.
SOLUTION
A work instruction, pneumatic presses, pressure blocks, and in serial applications — application stations with parameterised force and dwell time. A heated pressure block additionally speeds up bond formation.
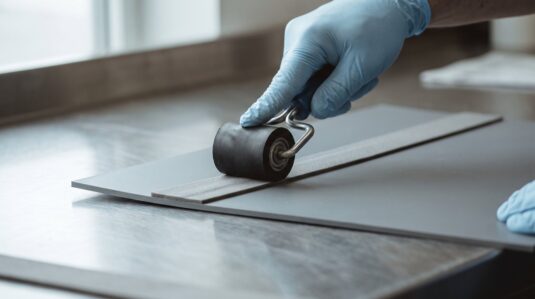
Photo 4. The application roller is the cheapest “activator” of a PSA adhesive — only under pressure does the adhesive flow into the substrate’s micro-profile. (Illustrative image.)
6. Disturbing the bond too early
PSA adhesives build strength over time. Right after application the bond has only 30–50% of its final strength. The adhesive reaches full properties only after 24–72 hours. Yet many teams test “whether it holds”, load the part, introduce vibration or move the part right after bonding. All of this destroys a bond that has not yet developed.
SOLUTION
Account for strength build-up in the process analysis and the flow of operations: no loads, vibration or transport immediately after application. Minimum 24 h of rest, 72 h for critical applications.
7. Stretching the material during application
This mistake often goes unnoticed, but it can be fatal. If the material is stretched during bonding, after application it “pulls back” and tears the tape off. Material stiffness works the same way — the part tries to return to its original shape, generating debonding forces. Particularly problematic is the shape memory of material from a roll: once unrolled, it still “wants” to be curved.
SOLUTION
Materials, carriers and adhesive layers of appropriate quality, application jigs that make stress-free application easy, and in serial production — automatic applicators.
RULE
If the material is stretched, the tape is fighting physics, not the surface. And it will always lose.
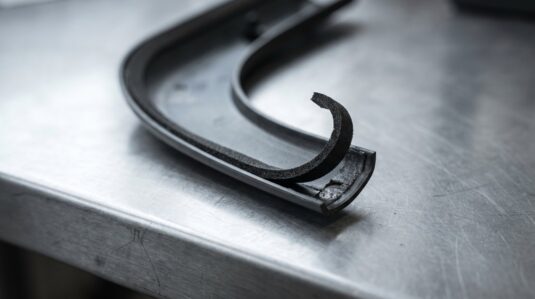
Photo 5. Shape memory in action: a bent part returns to its geometry and lifts the end of the tape. That is not an adhesive defect — it is stress in the material. (Illustrative image.)
Verifying preparation quality — three levels
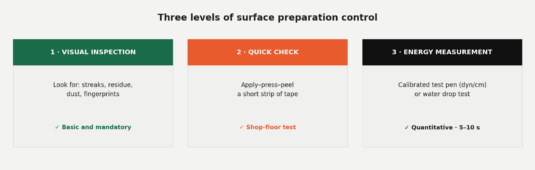
Fig. 3. Three levels of control: from simple visual inspection, through a quick tape test, to quantitative surface energy measurement.
Visual inspection
Basic and mandatory, yet the most frequently skipped. We look for streaks, residue, dust, fingerprints. The surface must be uniform, matte and dry. We verify that the operator did not “spread” the dirt instead of removing it. This simple check eliminates most errors.
Initial adhesion test (Quick Check)
Apply a short strip of tape, press it down and peel it off. Assess whether it comes off too easily and whether it lifts contamination or a coating. A simple test any operator can run after minimal training.
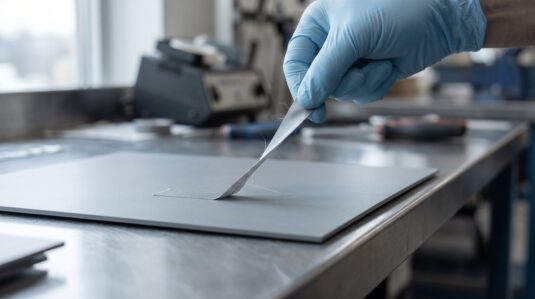
Photo 6. Quick Check: apply, press, peel. Thirty seconds that catch a badly prepared surface before the customer does. (Illustrative image.)
Surface energy measurement
A test pen or ink test (e.g. 38 dyn/cm), or a water drop test with contact angle assessment. It shows whether the surface “wants” the adhesive. Done in 5–10 seconds, it delivers hard numerical information. We covered the measurement methods and tool selection in detail in article 1/10 on LSE and HSE.
The specification almost nobody closes — the product’s minimum surface energy
Purchase specifications and drawings very easily acquire a minimum tape adhesion. No wonder — the values are at hand, because manufacturers publish them in technical data sheets (TDS). Far more rarely does anyone write in the other half of the equation: the minimum surface energy of their own product.
And without it, the adhesion requirement hangs in a vacuum. TDS values are measured on standardised plates — most often polished stainless steel — not on your part made of modified PP or recyclate. We know the result from complaints: the tape supplier meets the specification, the process follows the instruction, and the bonds still fail, because the only uncontrolled variable was the product’s surface.
How to close the specification:
- Write the minimum surface energy in the bonding area into the product drawing or specification — for most adhesives a practical threshold is ≥ 38 dyn/cm.
- Define the measurement method (test ink or test pen) and the moment of control: incoming material batches and — where activation is used — the end of the window between activation and bonding.
- For recycled materials and polymer blends — measure batch by batch, because batch-to-batch scatter can be larger than for virgin polymers.
- In complaints: first measure the product’s surface energy, only then discuss the tape.
PRINCIPLE
Adhesion from the TDS describes the tape. Surface energy describes your product. The specification is closed only when it contains both values.
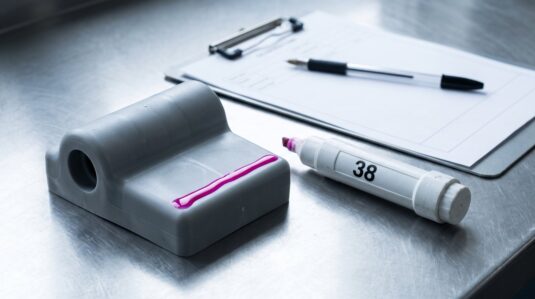
Photo 7. The measurement that closes the specification: the product’s surface energy measured in the bonding area and recorded in the documentation — next to the required tape adhesion. (Illustrative image.)
The most common organisational mistake: starting with the complicated approach
We often see it at customers: investment in plasma, corona, UV — before the basic problem has been solved. And the problem is most often missing degreasing, moisture, dust, the wrong wipe or low temperature.
PRINCIPLE
Basics first, special technologies later. Plasma, corona and primer are powerful tools — but they will not replace a fresh wipe, a clean glove and the right temperature at the workstation.
The second systemic problem is a lack of consistency. Every shift does it its own way, cleaning agents change, flash-off times differ. This leads to unrepeatable results and “random quality” — on Monday everything holds, on Wednesday half the batch goes to complaints.
The technologist’s checklist
| Step | What to do | How to verify |
|---|---|---|
| Specification | Minimum surface energy of the product in the bonding area (e.g. ≥ 38 dyn/cm) written into the drawing or specification | Entry in the documentation + ink measurement at batch acceptance |
| Environment | 20–25°C, humidity 40–70%, no condensation | Thermo-hygrometer at the workstation |
| Acclimatisation | Tape and materials at workstation temperature for at least several hours | Record of the delivery date from the warehouse |
| Cleaning | IPA or a dedicated agent, lint-free wipe, fresh | Process standard card |
| Flash-off | Wait until the agent has fully evaporated (typically 30–60 s) | Visual check — surface matte and dry |
| Inspection | Visual + optionally 38 dyn/cm test ink or pen | Recorded results per batch |
| Application | Immediately after liner removal, pressure 1.5–3 kg/cm² | Application roller with force control |
| Strength build-up | Minimum 24 h without load, 72 h for critical applications | Production plan accounts for the time |
Tab. 1. Surface preparation checklist — from the specification, through environment and cleaning, to bond strength build-up.
Summary
Seven mistakes, one checklist and one value in the specification that is easiest to forget. Surface preparation is not something you do “every now and then, when there is a problem”. It is a routine built into the process, with a documented procedure, verified results and a closed specification — on the tape side (adhesion) and on the product side (surface energy). Such a standard is quick to implement and delivers the highest return of all investments in bonding.
“Basics first, special technologies later.”
Tomasz Gorzawski, CVGS
CONTACT THE CVGS LABORATORY
Want to simplify surface preparation in your production? Book a consultation with the CVGS laboratory — we will help you implement a standard matched to your materials and working conditions.
Download the catalogue
Do you want to get more information about our company, products or services? Just provide your e-mail address and we will send the cvgs company catalog to it!
free consultation

